The essence of getting through 50 meters of sled push efficiently fits in one sentence: lock your body into a fixed line at roughly 40-50 degrees to the floor, keep your steps short and quick, and never stop breathing. When the sled stalls, the problem is usually not strength but failing to transfer that strength into the floor. In HYROX, this station isn't third but second in line — it comes right after the SkiErg and loads your legs hardest at the earliest stage of the race. That's why technique here shapes the rest of your race more than your station time.
Where does the sled push fall in the race, and how heavy is it?
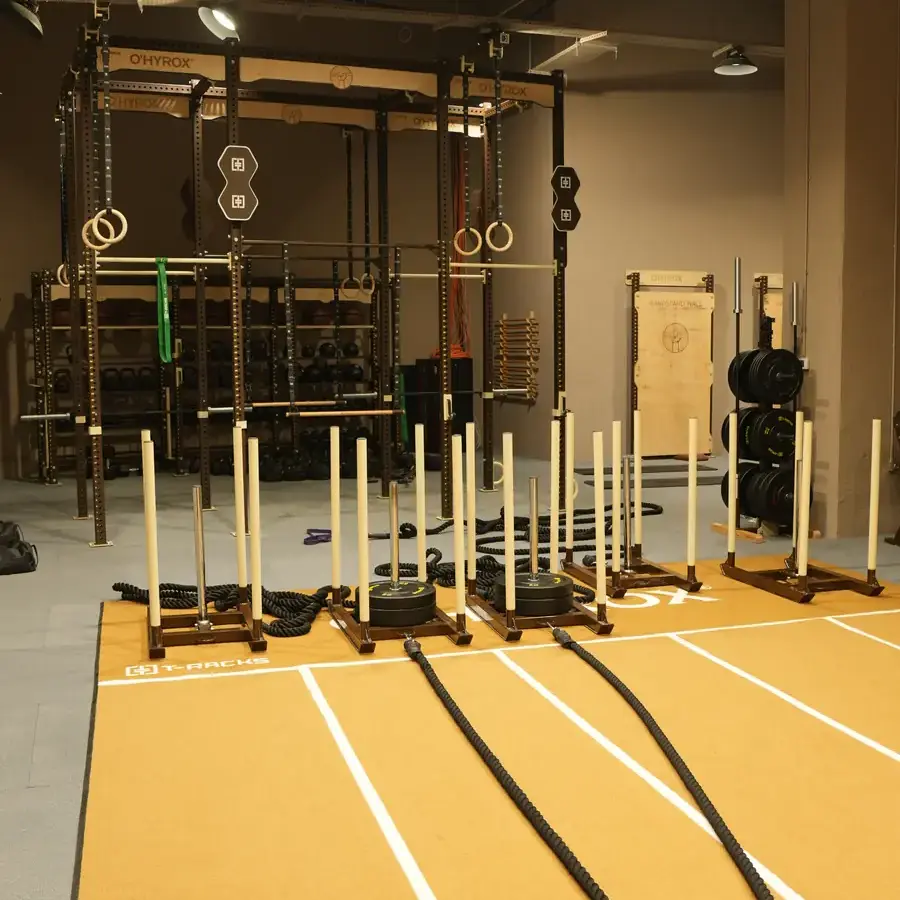
The order is fixed: 1 km run, 1000 m SkiErg, 1 km run, 50 m Sled Push. The sled is pushed forward four times over a 12.5-meter lane; at the turnaround points you have to reposition the sled, which is part of the technique.
| Category | Total sled weight (including sled) | Expected time range |
|---|---|---|
| Open men | approx. 152 kg | 1.40 – 3.30 |
| Pro men | approx. 202 kg | 2.00 – 4.00 |
| Open women | approx. 102 kg | 1.30 – 3.15 |
| Pro women | approx. 152 kg | 1.50 – 3.45 |
The time ranges are wide because the same load feels very different on different surfaces. We explained the reasons one by one in our why the sled push is so hard article we explained one by one. For the load table of all divisions, Open vs. Pro loads comparison for more.
Step-by-step sled push technique
1. Setup: arm position and grip height
Grab the sled's vertical poles not at the highest possible point but slightly below chest height. Holding too high makes your torso upright and directs the push upward; holding too low locks your shoulders and compresses your breathing. Your arms should be almost fully straight at the elbow — when you push with bent elbows, part of the force is lost in your arms.
Position yourself with your shoulders ahead of your hips and your hips ahead of your heels. Head neutral, eyes on the floor just in front of the sled. Looking up forces your torso upright.
2. Torso angle: the most critical variable
Create one unbroken straight line from your ankle to your shoulder and hold it at roughly 40-50 degrees to the floor. This angle sends as much of your pushing force as possible in the horizontal direction. If you stand too upright, the force presses the sled into the floor and increases friction; you make your own job harder. If you're too flat, your lower back takes the strain and you lose room to step.
Your back should stay flat and your hips shouldn't shoot up. The moment your hips rise, your body stops being a line and force transfer breaks down.
3. Steps: short, quick and on the forefoot
The right step isn't a long lunge but a short, quick drive. Plant your foot right under your hips, keep your heel off the floor, and push through your toes. Step length usually stays in the 30-50 centimeter range. Trying to take long steps creates two problems: your torso angle breaks down and the sled stalls for a moment with every step. Getting a stalled sled moving again costs far more than keeping it moving.
Think of your cadence goal like this: if you slow down, shorten your step, don't speed up. The sled push isn't a sprint, it's a job of constant pressure.
4. Breathing: continuous and audible
Under heavy load, the first reflex is to brace the abdomen and hold your breath. That works for 5 meters and collapses by 20. The right pattern: keep your abdominal wall tight but keep air flowing. Exhale audibly through your mouth every two steps. If you can hear yourself, you're not holding your breath. Your heart rate will already be peaking at the end of 50 meters; keeping your airway open is essential to head out onto the run from here.
5. Turnaround points and planned breaks
Every 12.5 meters you turn the sled and realign it. This three-second job is also a deliberate breathing window. Take your break here, as planned — 5 to 10 seconds, both hands on the sled poles, body upright. Letting go of the sled and putting your hands on your knees doesn't lower your heart rate; it only delays recovery.
Four-lane transition protocol
- 0-12.5 m: Start under control. Getting the sled moving in the first 3 meters takes extra force; then hold the pressure steady. Goal: unbroken.
- Turn 1: Align the sled, 5 seconds of breathing. Stay upright.
- 12.5-25 m: Same pace. Lock your breathing rhythm into one exhale every two steps.
- Turn 2: 8-10 seconds of breathing. This is the halfway point and where you need recovery the most.
- 25-37.5 m: Your steps will shorten, that's normal. Check your torso angle; it's the first thing to go when you tire.
- Turn 3: 5-8 seconds. Get mentally ready for the last 12.5 meters.
- 37.5-50 m: Finish without stopping. Don't speed up in the last 5 meters, just maintain the pressure.
- Exit: Let go of the sled and walk straight toward the exit. Bring your heart rate down as you walk; we covered the seconds lost in the transition zone in our Roxzone article.
This plan looks slower than going unbroken, but in practice it produces a shorter total time for most amateur athletes because there's no real collapse midway.
The sled's first movement is the most expensive part of every lane. The force needed to get a stopped sled moving is noticeably greater than the force needed to keep a moving sled going. So when you realign the sled at the turnaround points, don't think of it like a wheel: get your body into position, brace your core, then start with a single decisive drive. Trying to push on the second and third attempt wastes several seconds.
You shouldn't leave the length of your breaks to chance either. Test your own breaks in seconds during training before the race; most athletes lose more in time than they gain in recovery once they go beyond 8 seconds. You should build your break policy across all eight stations with the same logic.
6 common mistakes and how to fix them
- Standing too upright. Symptom: the sled feels heavy, your feet slip. Fix: move your hands down a notch, bring your shoulders ahead of your hips, bring the line closer to 45 degrees.
- Taking long strides. Symptom: the sled stalls with every step. Fix: cut your step in half, don't increase cadence; aim for constant pressure.
- Bending the elbows. Symptom: burning in the shoulders and chest, body swaying. Fix: lock your arms straight and push the sled with your legs, not your arms.
- Holding your breath. Symptom: a sudden blackout feeling around 25 meters, unable to run at the exit. Fix: exhale audibly every two steps.
- Landing on the heels. Symptom: calf cramps, force leaking backward. Fix: stay on the front half of your foot; if your ankle range of motion isn't enough, work on mobility separately. We covered the connection in our ankle range of motion article.
- Refusing to take breaks. Symptom: a full stop at 35 meters and 40 seconds lost. Fix: build planned breaks into the turnaround points.
5 accessory exercises to prepare for the sled push
- Heavy sled push intervals: 6-8 x 15 meters at 10-20 percent above race load, 90 seconds between sets. Real load on the real movement is the best preparation.
- Bulgarian split squat: 3-4 sets x 8-10 reps/leg. Builds single-leg drive strength and hip stability; for variations, see our single-leg strength article .
- Heavy incline walk: 4 x 60 seconds at a 10-15 percent incline with a weighted vest or weights in hand. Mimics the torso angle and forefoot drive; the types of hill work in the hill running article in our running guide.
- Front squat or back squat: 4-5 sets x 4-6 reps. A general leg strength base; we compared how to choose variations in our squat variations article.
- Calf and tibialis work: Standing calf raise 3 x 15, tibialis raise 3 x 20. Endurance around the ankle makes a difference in the last quarter of the 50 meters.
How do height, weight and arm length change technique?
The sled push is the HYROX station where body weight turns most clearly into an advantage. A heavier athlete can apply more mass to the sled, meaning they move the same load with less effort. For lighter athletes the solution isn't to build more strength but to improve the angle and raise step cadence: holding the body line slightly flatter and shortening the step even more closes part of the mass gap.
Tall athletes face a different problem. Long arms naturally raise the grip point and make the torso upright. The solution is to grab the sled poles lower and, if necessary, accept an elbow bent a few degrees rather than fully straight. Long legs don't mean long steps either; step length should still stay in the 30-50 centimeter range.
Shoe choice is part of the technique at this station. A running shoe with a thick, soft sole swallows part of the force you transfer to the floor; a flatter, firmer model gives noticeably better drive. This balance between the eight runs and the sled in our HYROX shoe selection article .
The first 200 meters out of the station
An athlete coming off the sled push has legs like stone, and their running stride should be deliberately short for the first 100-150 meters. Keeping cadence while shortening stride length is the fastest way to rebuild rhythm while keeping your heart rate under control. How to make this transition automatic through training fatigued running article in more detail.
If you feel sharp pain in your lower back, strain inside the knee or stiffness in the calf that won't go away, reduce the load and see a doctor if the complaint persists. At the club we train sled technique with real race load on a real race surface; our session types on the classes page for more.
What should your torso angle be on the sled push?
You should build an unbroken line from ankle to shoulder and hold it at roughly 40-50 degrees to the floor. Standing upright directs force downward; leaning too far strains your lower back.
How long does a 50-meter sled push take?
In the Open category, most athletes finish between 1:30 and 3:30. Floor friction and category load can shift this range significantly.
Is it OK to take breaks on the sled push?
It's fine, as long as it's planned. For most amateurs, completing it in four lanes with 5-10 second breaks at the turnaround points is faster than forcing it in one go.
Which muscle groups should you train for the sled push?
Quads, hip extensors, calves and core come first. Ankle range of motion matters as much as strength; it needs to be trained separately.
A stronger version of you.
Just one step away.
24 hours from your first message to your first session. Let's build your program together — reach out on whichever channel suits you.
Weekdays 06:00 - 23:00